Getting Started Guide
We’ll give you a quick overview of the major features in the app so you can dive straight in and get organising your Audio Units with Auganizer quickly and easily.
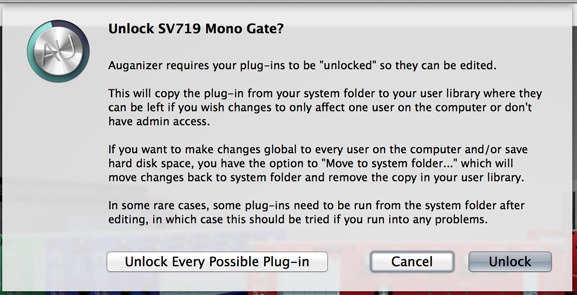
Unlocking.
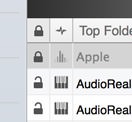
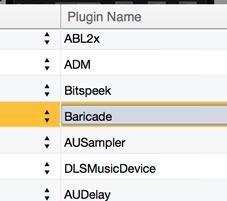
When you first open Auganizer it'll search for your Audio Units and present them in the main window, and iTunes/Finder like familiar list view. For any AU’s installed in the system folder and not your user’s home folder you will need to unlock them to edit in Auganizer by clicking one of the lock icons on the left of the main list window (as picture in the second image on the left), or by choosing the "Unlock" option in the "Actions" menu. You can unlock individual plugins, selected plugins, or most likely all plugins at once. This process copies the plugins to your user folder for editing where you can choose to keep so changes only affect your user on the machine, or to save disk space and if you admin access when finished you can copy changes back to the system folder as explained below.
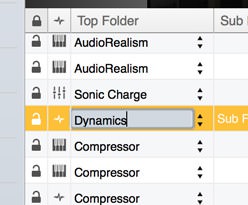
Top Folder.
Once the system plugins are unlocked you can edit any of them in the main window. You can double click on the information you wish to edit. The “Top Folder” column refers to the top most folder in your hierarchy, this is currently by Audio Unit standards, the manufacturer name. Double click on any manufacturer name to edit and enter your own top category (such as Dynamics)..
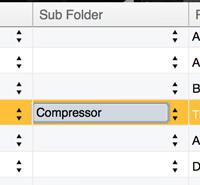
Sub-Folder.
The “Sub Folder” column is for sub folders within Logic (note Ableton does not support sub-folders, Ableton users should leave this blank, or hide the column in the view menu). You can for instance sub define plugins here, taking our “Dynamics” example to sub categories such as “Single Band”, “Multi-Band”, “Limiting” etc. An important note; Logic sees this as the start of the plugin name, so once inserted the name in the insert/mixer will start with the sub-folder name. Consider this when deciding if you wish to organise your plugins into sub-folders or not.
Plugin Name.
The “Plugin Name” column, as it sounds, is the name of the plugin as it would appear under the sub-folder. Enter what you wish here, but note you are limited to a combined 30 characters split between the “Sub Folder” name (as mention above you of course don't have to use the sub folder option) and the plugin name, this is an Audio Unit specification limitation. If you select multiple plugins by pressing the "Apple key" or holding "Shift" a pop up window will allow you to change "Top Folder" or "Sub Folder” names in bulk to speed up the process.


Sidebar.
Auganizer has three windows which can be toggled on and off. The sidebar on the left can be shown or hidden with the left-most button in the top right 3 icons on the toolbar and it displays your top level folder names - as you rename plugins the sidebar will give you the hierarchal view that will be shown in Logic, so its useful to see how things will look as you go along. Upon launching Auganizer for the first time it will show the manufacturer names and as you rename will become a list of your top level folders. You can select all plugins in these categories by clicking the name here. The remaining two buttons here show and hide the status bar displayed along the bottom which gives processing information and total plugins found and the final button shows and hides the Cover Flow window displaying plugin GUI's.
Filtering.
Auganizer has a number of powerful filtering options for long lists. As well as the side bar, you can use the buttons under the top toolbar to show or hide plugins in the list. Starting on the left is the "Show All" button which will turn off all filters and show every plugin found by Auganizer. Next are four buttons which represent ‘Generators’, ‘Instruments’, ‘Effects’ and ‘Midi Controlled Effects’ respectively. Followed by the option to show/hide 32 bit plugins and lock/unlock all plugins. The icons on these buttons correspond to the icons shown in the main list view window.

Actions Menu.
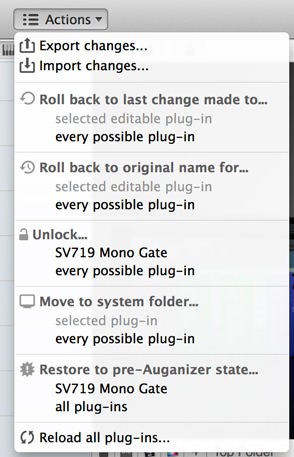
New in v1.1 is the Actions menu. This menu contains all Auganizer's advanced actions. Starting at the top you have the ability to export your changes to a file which you can backup somewhere safe like Dropbox or a USB key. You can then import these settings at any time (note plugins must be unlocked BEFORE you can import settings). The menu contains two undo options known as "Roll back" - you can roll back to your previous edit, or you can roll back at any point to the original name of the plug in. Following this is the previously mentioned "Unlock" action which allows you to unlock selected, or all plugins for editing followed by the new important "Move changes to system folder" option which is explained in more detail below. Rounding off the new actions menu is a safety/panic option which allows you to restore your system to a pre-Auganizer state, or restore one potential problem plugin to a pre-Auganizer state in the rare event you find an issue and finally you can refresh the plugin view if you want to update to see any newly installed plugins without closing Auganizer.
Move to System Folder.
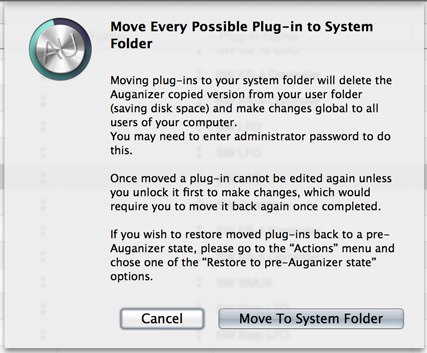
The new "Move to System Folder" action in Auganizer allows you to move all changes back to the system folder. You do not NEED to do this, a change is applied as soon as you press 'enter' on a rename in the main window, however if you wish to save disk space, apply changes globally to all users and you have admin access, copying back to the system folder is the best option. There are a handful of plugins which MUST be copied back to the system folder to operate properly, these are listed when you unlock them in Auganizer.
Full Restore.
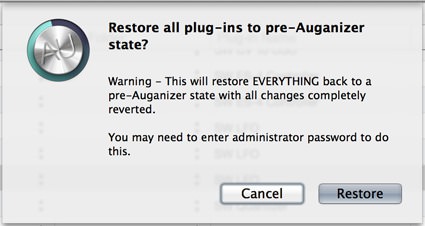
As of v1.1 Auganizer has the ability to do full restore from the "Actions" menu. This COMPLETELY restores the system to a "pre-Auganizer" state. It also gives you the ability to restore single, or groups of plugins, just on the off chance you experience a problem with a particular problem with a plugin during a session as a safety net.
Help FAQ
Some FAQ questions about Auganizers usage.
The easiest way to work with the plugins is to have full access to them in your user directory. This enables two things, any changes you make are for your user only on the system and not others and you don't need access to an admin password to make these changes. The downside is that plugins are duplicated so can take up disk space. Logic, Garageband and Ableton will always use plugins in your home folder first as a priority this is system default so it will not change anything about the way your system works. This method enables us to work with the latest Apple API's, full Apples developer guidelines and allows you to make changes without needing admin control over the computer and without affecting all other users. The long term goal is to have an option to edit system plugins in place, but this take a lot more time, you'll need admin access and we'll have to use other depreciated API's for it to work with 32bit and legacy plugins.
Yes, there is a long 30 minute walkthrough of all the features of Auganizer 1.1 available here.
We did are our best to try and test with every plugin we could get our hands on before release, but obviously there are thousands of rare and lesser known plugins floating around and some premium ones we did not own. 90% of plugins all confirm to Apple's strict standards, but some devs stray slightly with their meta data, using illegal characters, doing something quirky or still employing legacy methods in 64bit plugins which means we have to add rules specially for these plugins. Slowly and surely we'll ensure 100% compatibility with everything. In the meantime if you find a plugin doesn't appear in your Auganizer list or gives an error when attempting to edit, please send its manufacturer name, plugin name and version number to [email protected]
NAVIGATE
ABOUT US
We are a new development team making original, intuitive and beautiful apps to solve various problems. Auganizer is the first release from our two man studio.
CONTACT
LEGAL
Mac, OS X, Cover Flow, Logic, Logic Studio, Cocoa, Garageband, iMac, MacBook, MacApp and Retina are trademarks of Apple Inc., registered in the U.S. and other countries.